
A Complete Spring AC Startup Checklist for Reliable Cooling
Air conditioners usually break down in spring, not in the middle of July. Problems start early, when routine prep gets skipped.
Months of sitting idle allow debris to pack into condenser coils, capacitors to weaken, drain lines to dry out, and electrical connections to loosen. The first hot day exposes everything.
Proper spring startup reduces early season breakdowns, lowers amp draw, improves efficiency, and protects compressor life.
Below is a complete, professional grade guide on how to prepare your air conditioner for spring startup, built for tradespeople and maintenance professionals.
Spring AC Startup Checklist
| Task | Why It Matters | Risk If Ignored |
| Shut off power and inspect wiring | Prevents electrical failure | Short circuits, blown fuses |
| Clean condenser coil | Reduces head pressure | High energy use, compressor stress |
| Flush condensate line | Prevents water damage | Ceiling leaks, float switch trips |
| Replace air filter | Maintains airflow | Coil icing, low capacity |
| Test capacitors | Prevents hard starts | Compressor failure |
| Check refrigerant levels | Confirms system charge | Poor cooling, high pressure |
| Inspect blower and ductwork | Protects airflow | Reduced efficiency |
Save this list. Use it on every startup.
Step 1: Disconnect Power and Perform a Visual Inspection
Turn off power at the breaker and outdoor disconnect.
Inspect:
- Contactor contacts for pitting
- Capacitor for swelling or oil leakage
- Low voltage wiring for rodent damage
- Compressor terminals for burn marks
- Suction line insulation for UV deterioration
Capacitors commonly fail after winter. Replacing one during startup prevents a peak season callback.
If replacement is needed, browse dual run capacitors matched to system specifications.
Step 2: Clean the Outdoor Condenser Coil Correctly
Condenser coils reject heat from the home. Dirt traps heat. Heat raises head pressure. High head pressure increases compressor amp draw.
Energy consumption can rise 10 to 30 percent from coil blockage alone.
Procedure:
- Remove fan assembly carefully
- Rinse from inside out using low pressure water
- Apply non acidic coil cleaner if buildup is heavy
- Straighten bent fins with a fin comb
For additional cleaning guidance, review coil cleaning best practices on the SupplyHouse blog.
Do not use high pressure. Damaged fins restrict airflow permanently.
Step 3: Clear the Condensate Drain Line
Clogged condensate drains are one of the most common spring AC problems.
Steps:
- Inspect drain pan for cracks or rust
- Flush line with water
- Vacuum or blow out obstruction
Algae growth during winter dormancy often blocks lines. A simple flush prevents drywall damage later.
Step 4: Replace the Air Filter and Check Airflow
Airflow directly affects system capacity.
Low airflow causes:
- Frozen evaporator coils
- Liquid refrigerant floodback
- High energy bills
- Reduced cooling performance
Install a clean air filter with correct sizing and airflow direction.
If selecting a new filter type, review guidance on MERV ratings and how they impact airflow.
Target airflow: approximately 400 CFM per ton of cooling.
Step 5: Inspect the Indoor Evaporator Coil
Even light dust reduces heat transfer.
Look for:
- Matted dust buildup
- Oil residue from potential leaks
- Biological growth
Clean with approved indoor coil cleaner when accessible.
Reduced evaporator efficiency raises suction pressure and lowers system performance.
Step 6: Test Electrical Components
Spring is capacitor failure season.
Use a multimeter with capacitance testing to verify:
- Capacitor microfarad rating
- Voltage balance
- Contactor coil function
If contactor points are pitted or worn, replace using a properly rated electrical contactor.
Capacitors should test within manufacturer tolerance, typically ±6 percent.
Loose electrical lugs increase resistance. Resistance increases heat. Heat shortens component life.
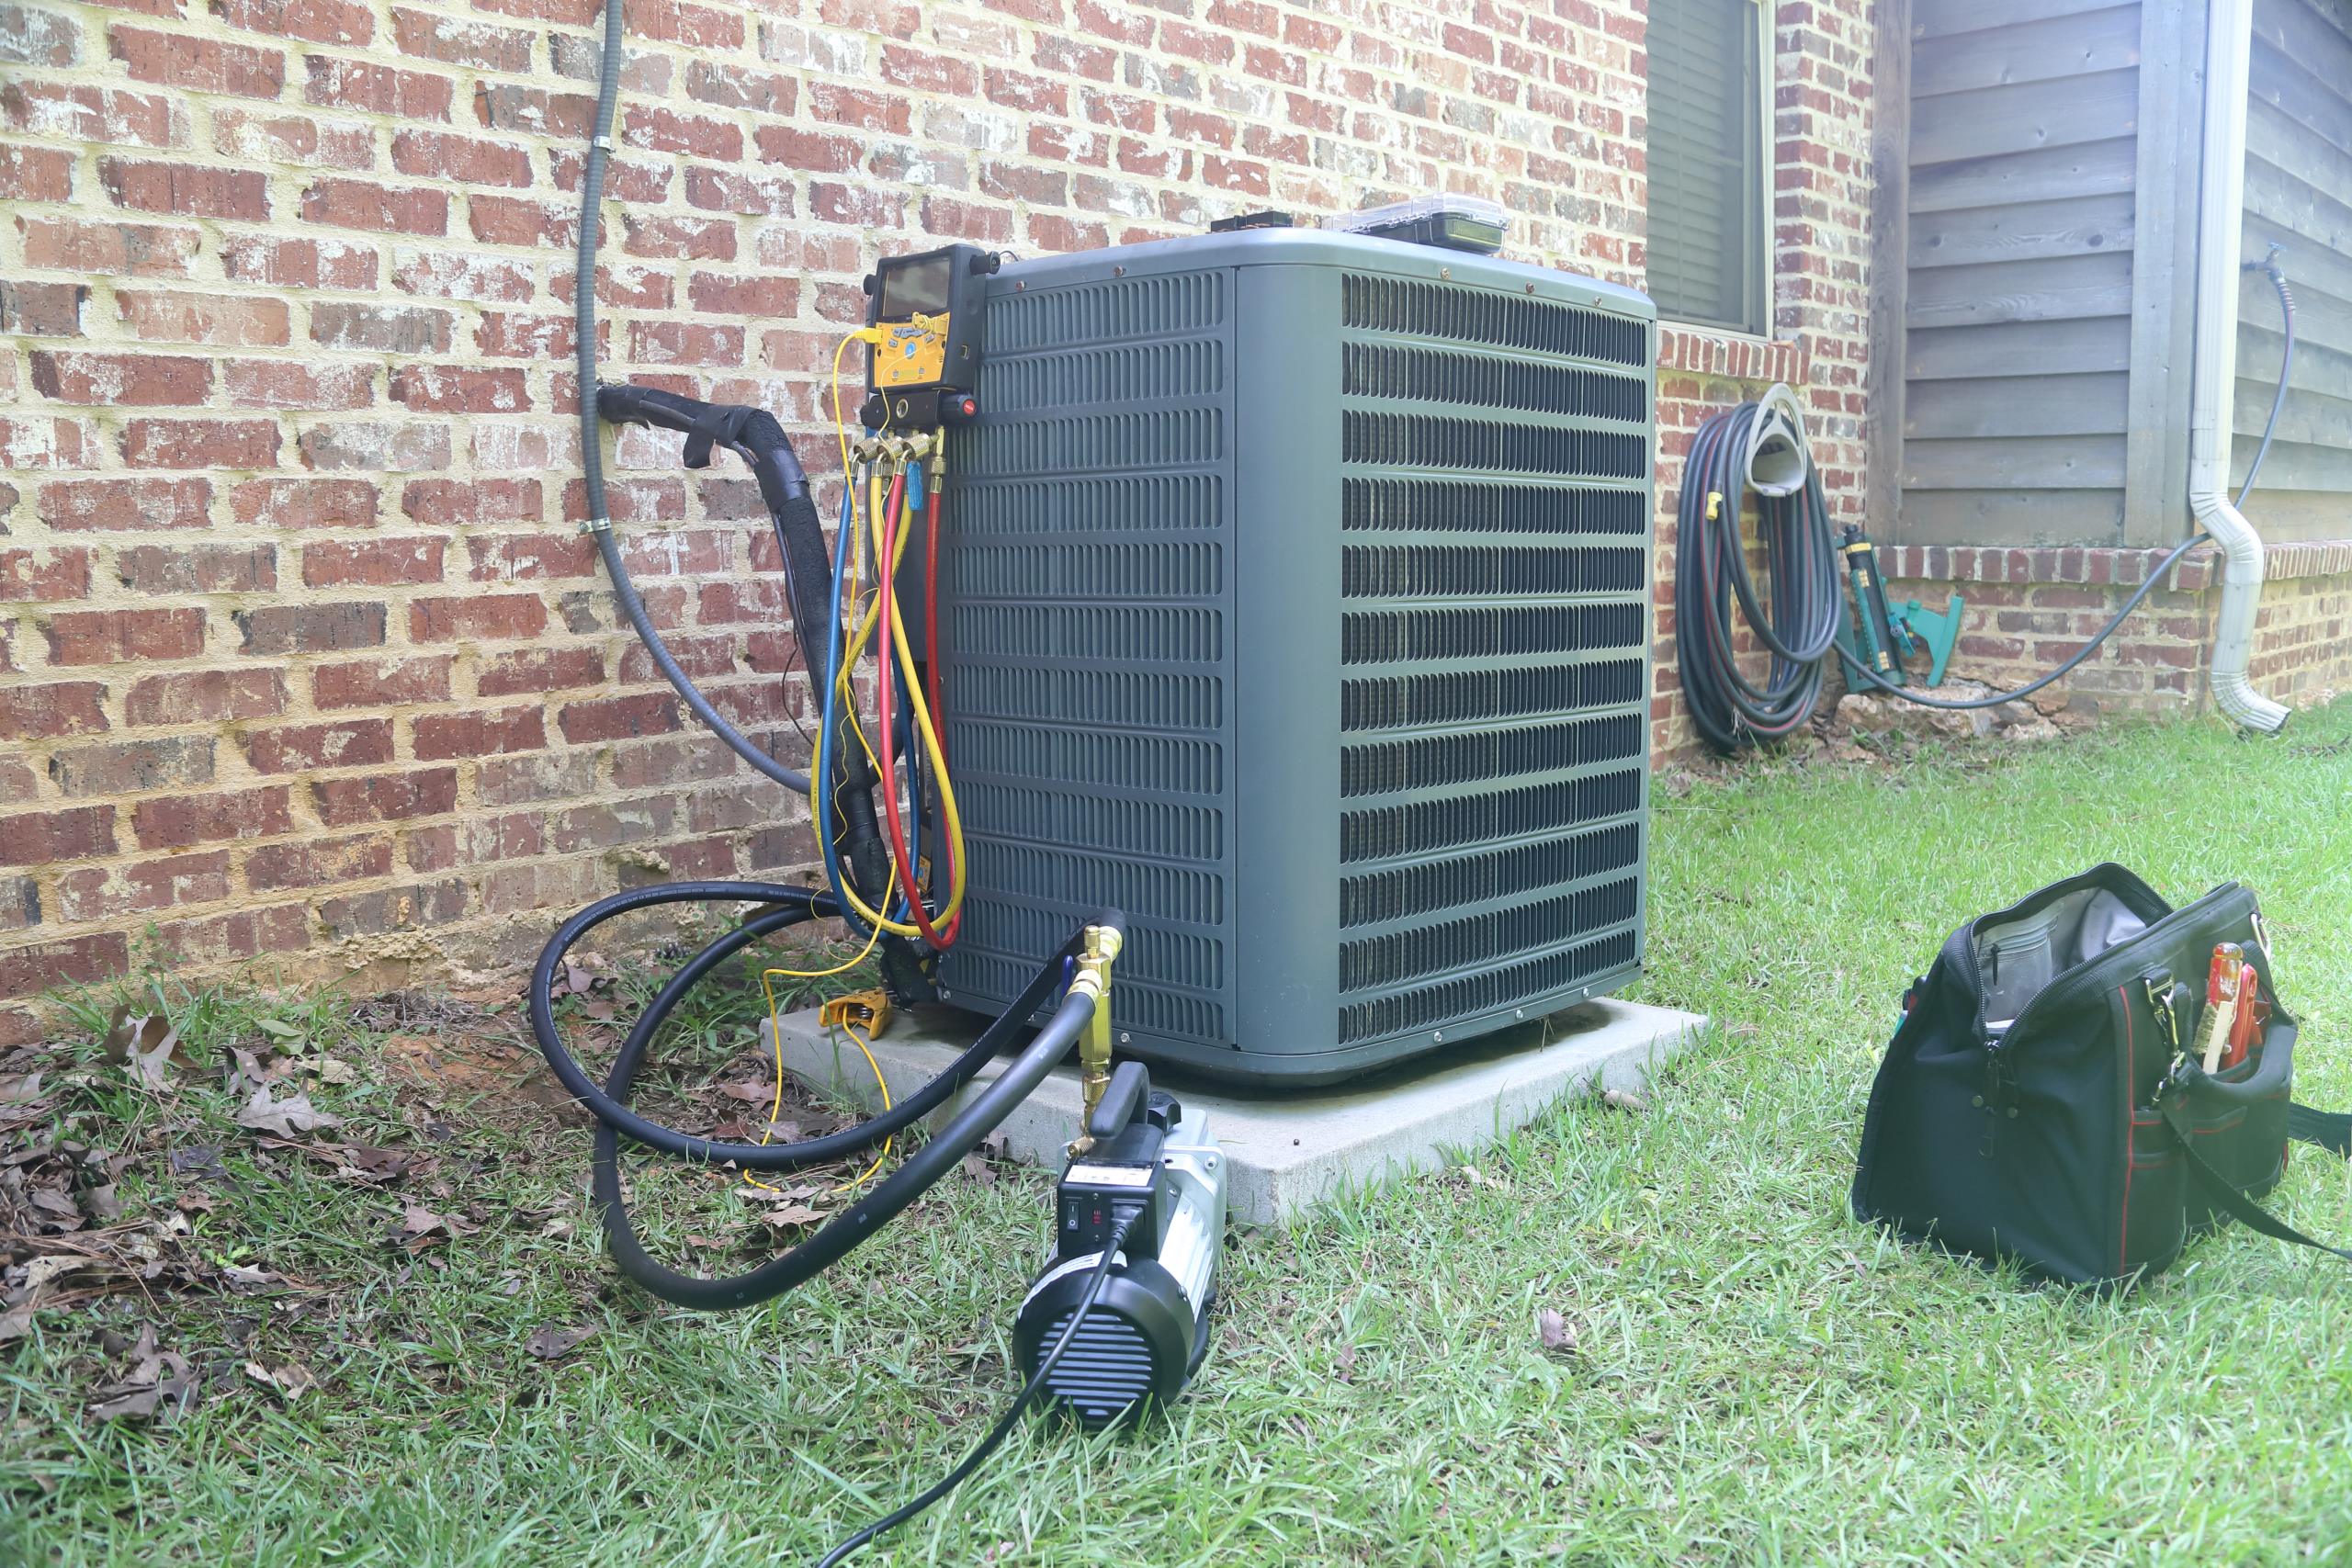
Step 7: Restore Power and Perform Controlled Startup
After inspection and cleaning:
- Restore power
- Set thermostat to cooling
- Observe startup sequence
Measure:
- Suction pressure
- Discharge pressure
- Superheat
- Subcooling
- Temperature split
Normal temperature split: 16 to 22 degrees Fahrenheit under typical load conditions.
Document readings. Trend data prevents guesswork during future service calls.
Step 8: Inspect Refrigerant Lines
Check for:
- Oil staining
- Kinks or rub damage
- Missing suction line insulation
Oil around fittings often indicates a slow refrigerant leak. Early detection prevents compressor damage.
Replace deteriorated insulation to improve efficiency and reduce condensation.
Step 9: Evaluate Blower and Duct System
Cooling depends on airflow as much as refrigerant.
Inspect:
- Blower wheel cleanliness
- Return air obstructions
- Duct separations
Dirty blower wheels can reduce airflow by 15 percent or more.
Measure total external static pressure and compare to manufacturer specifications.
Common Spring AC Startup Failures
Field service data shows the most frequent early season failures are:
- Failed capacitors
- Dirty condenser coils
- Blocked condensate lines
- Loose electrical connections
- Weak contactors
Replacement components including HVAC capacitors, contactors, and condenser fan motors are commonly stocked for spring startup season.
Most failures are preventable during proper preparation.
Tools and Replacement Parts for AC Spring Startup
Keeping common replacement items on hand improves turnaround time:
SupplyHouse carries a wide range of HVAC startup components for residential and light commercial systems.
Preparation protects schedule stability and profit margin.
How Long Does Spring AC Startup Take?
| Service Level | Estimated Time |
| Basic cleaning and inspection | 60 to 90 minutes |
| Full diagnostic with airflow and refrigerant verification | 90 to 120 minutes |
Time invested in spring reduces multi hour emergency calls in peak heat.
Frequently Asked Questions
When should an air conditioner be started for spring?
Outdoor temperatures consistently above 60 degrees Fahrenheit provide safe testing conditions. Avoid running cooling mode when ambient temperature is below manufacturer guidelines.
How often should an AC be serviced?
At minimum, once per year before cooling season. Systems in high pollen or debris environments may require additional cleaning.
What happens if an air conditioner is not cleaned before summer?
Dirty coils raise head pressure, increase energy consumption, reduce cooling capacity, and shorten compressor life.
Can an AC unit sit unused all winter without damage?
Mechanical components can sit safely, but electrical components such as capacitors often degrade during extended inactivity.
What temperature split should an air conditioner produce?
Typical residential systems produce a 16 to 22 degree Fahrenheit difference between return and supply air under normal humidity conditions.
Final Word: Spring Startup Is Preventive, Not Optional
Spring startup is commissioning after dormancy.
Clean coils reduce compressor strain. Verified airflow protects capacity. Tight electrical connections prevent heat buildup. Clear drain lines prevent property damage.
Professionals who standardize spring AC preparation see fewer callbacks, steadier workflow, and more reliable equipment performance through summer.
Cooling season rewards preparation.