
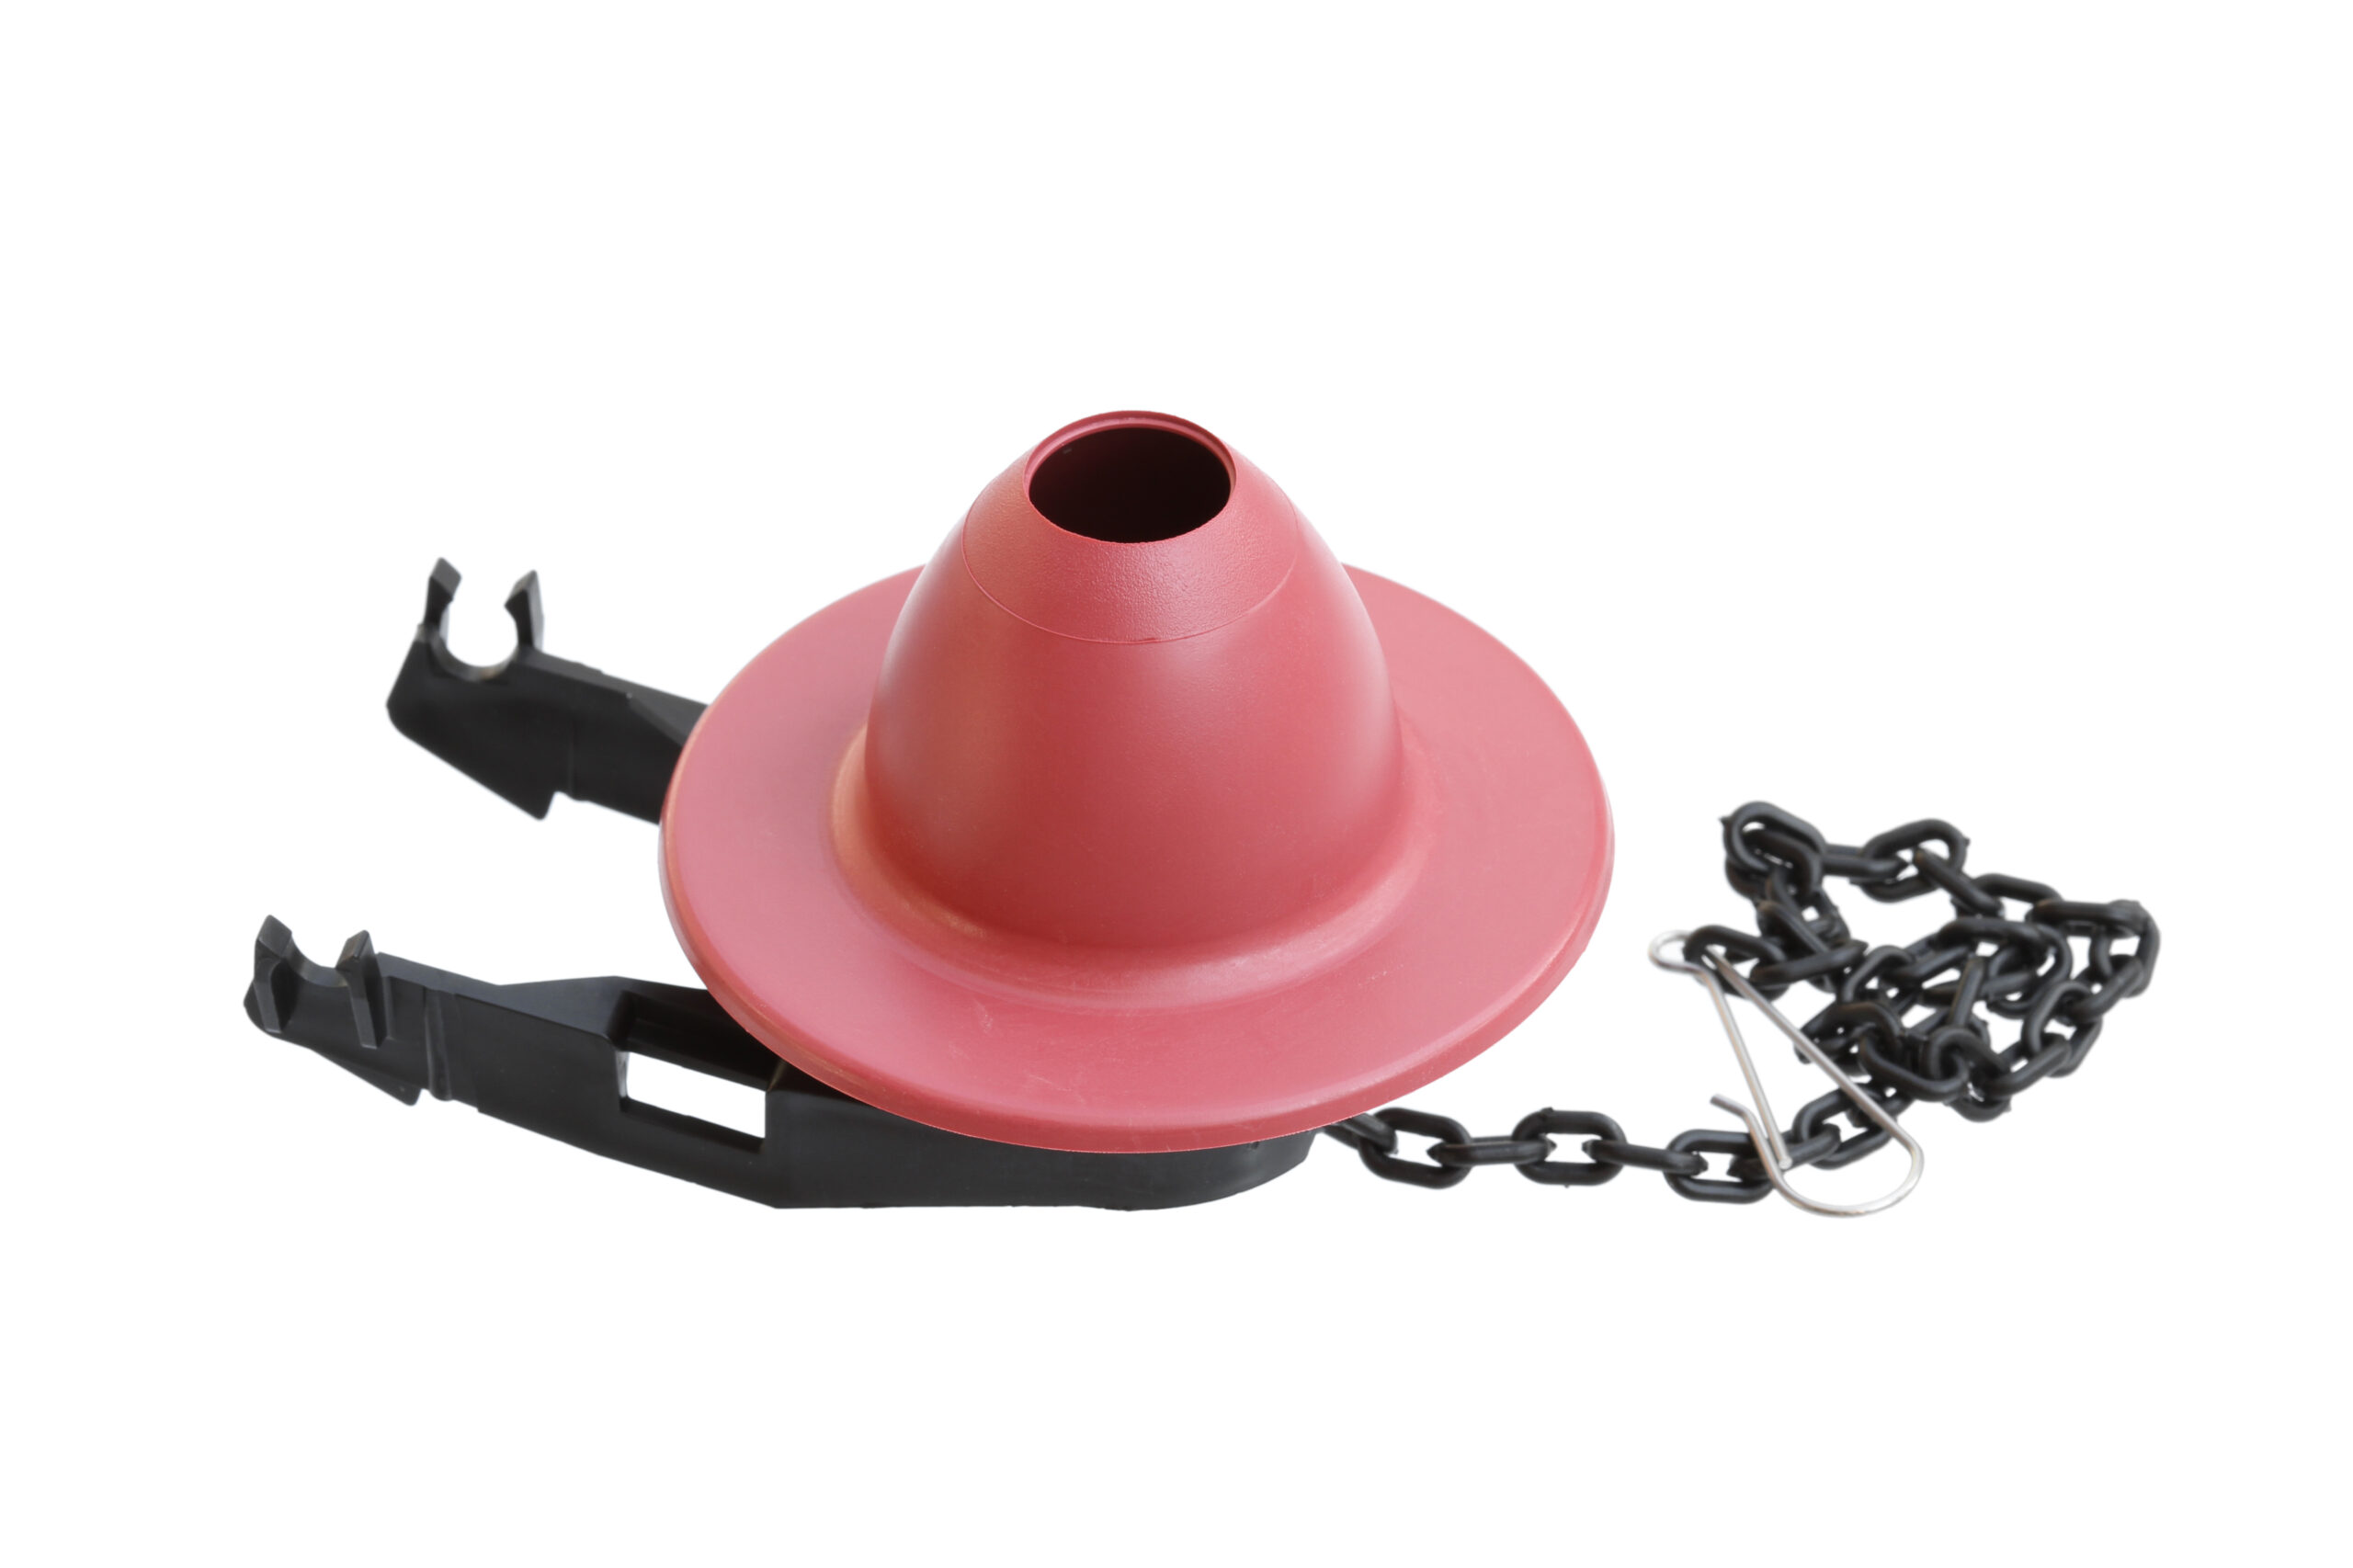
 A toilet that runs between flushes is one of the most common calls a plumber gets, and one of the easiest fixes in the trade. Nine times out of ten, the culprit is a worn flapper. The rubber degrades, hardens, or picks up mineral buildup, and the seal it makes against the flush valve seat stops holding. Water trickles into the bowl continuously. The tank never quite fills. That hissing sound that won’t quit? Flapper. The good news: a flapper swap takes under 30 minutes, costs next to nothing, and doesn’t require draining the tank or pulling any supply lines. It’s the kind of repair that makes sense to knock out while already on-site for something else, and worth knowing cold for any homeowner who wants to stop wasting water.
How to Tell the Flapper Is the Problem
Before swapping the flapper, confirm it’s actually the source of the running water. The dye test is the fastest way to check.
Drop a few food coloring tablets or a few drops of food dye into the tank. Don’t flush. Wait fifteen minutes. If color shows up in the bowl without a flush, the flapper isn’t sealing. Water is leaking past it continuously. That’s a failing flapper.
A few other symptoms point the same direction:
- The toilet runs for 30 to 60 seconds after flushing, then stops, then starts again.
- The fill valve is cycling to top off water lost through a slow leak.
- Jiggling the handle stops the running. The chain connecting the handle arm to the flapper may be catching, holding the flapper slightly open.
- The flush is weaker than normal. A flapper that opens slowly or doesn’t rise fully limits the water dump into the bowl.
If the dye test comes back clean and the tank is still running, the issue is likely the fill valve, not the flapper. That’s a different repair covered separately.
Flapper Types and How to Pick the Right One
Not all flappers are interchangeable. The two most important variables are valve seat size and toilet age.
| Flapper Type | Valve Size | Best For | Notes |
| Standard universal | 2 inch | Pre-1994 toilets, 3.5+ GPF | Solid frame, mounts over pegs or overflow tube |
| Adjustable universal | 2 inch | 1.28–3.5 GPF toilets post-1994 | Float dial adjusts water volume per flush |
| 3-inch universal | 3 inch | High-efficiency toilets post-2005 | Wider opening for faster flush, adjustable settings |
| OEM-specific | 2 or 3 inch | TOTO, Kohler, Eljer by model | Best seal on brand-specific valve seats |
To confirm the size before buying, check the drain opening at the bottom of the tank. A 2-inch opening is roughly baseball size. A 3-inch opening is closer to softball size. The toilet model number is stamped inside the tank, usually on the back wall under the lid. That number makes it easy to cross-reference the correct part.
- For 2-inch flush valves on toilets made before 1994 (3.5 GPF or higher), the Fluidmaster 501P21 Universal Flapper with Microban is a proven workhorse. Solid frame, chlorine-resistant, and built-in Microban protection that fights bacteria-driven rubber breakdown.
- For 1.28 to 3.5 GPF toilets made after 1994, the Fluidmaster PRO56 Universal Fit Flapper with Microban is the better call. The adjustable float dial lets the installer fine-tune how much water releases per flush, which is the detail that separates a good flapper job from a callback.
- For 3-inch flush valves, the Korky 3060BP Universal 3″ Flapper fits the majority of high-efficiency models from TOTO, American Standard, Gerber, and Mansfield. For TOTO G-Max toilets specifically, the Korky 2023BP Genuine TOTO G-Max 3″ Flapper is the right match. Eight adjustable settings dial it in for any TOTO tank number.
- For general-purpose 2-inch replacements, the Korky 2001BP Plus Universal Toilet Flapper covers a wide range of manufacturers and flush valve designs. It’s a reliable go-to when the toilet brand or model isn’t immediately identifiable.
Browse the full toilet flappers category at SupplyHouse for the complete selection.
What You’ll Need
No specialty tools required. Standard items already on the truck or in the cabinet will cover it.
- Replacement flapper (correct size for the flush valve)
- A rag or small towel
- Food coloring or dye tablets (for leak test)
- Adjustable pliers (optional, for stubborn old flappers)
The repair doesn’t require shutting off the water to the building. The toilet stop valve handles it. If the stop is corroded or won’t move, shut the main first.
Step-by-Step: How to Replace a Toilet Flapper
- Remove the tank lid and set it aside on a flat surface. Porcelain chips.
- Turn the toilet stop valve clockwise until fully closed. It’s on the wall or floor behind the left side of the tank. Test by flushing once to clear the tank.
- Identify how the flapper attaches. Most flappers connect by two side pegs that hook onto the ears of the overflow tube. Some attach by looping around the neck of the overflow tube with no ears.
- Disconnect the chain from the handle arm by unclipping or unhooking it.
- Unclip the flapper pegs from the overflow tube ears, or slide the collar off the overflow tube neck. Old rubber may be sticky or stiff. A light tug or gentle use of pliers frees it without damaging the seat.
- Inspect the flush valve seat, this is the ring at the bottom of the tank opening where the flapper rests. Run a finger around it. Pitting, cracks, or hard mineral buildup on the seat means the seat won’t seal even with a new flapper. In that case, the full flush valve needs replacement. See the guide to replacing a toilet flush valve for that job.
- Install the new flapper. Clip the pegs onto the overflow tube ears, or slip the collar over the tube neck. The flapper should sit flat and centered over the valve seat with no torque or twist.
- Reconnect the chain to the handle arm. Leave about 1/2 inch of slack, this length is enough that the flapper can drop freely when the handle is released, but not so much that the chain folds under the flapper and holds it open. The link count on the chain matters. Too tight, and the flapper won’t seal. Too much slack, and it gets pinched.
- Turn the stop valve back counterclockwise and let the tank fill.
- Run the dye test again. Drop food coloring into the filled tank and wait fifteen minutes without flushing. No color in the bowl means a clean seal.
- Flush once and watch the handle return. The flapper should drop cleanly. The tank should fill to the correct waterline, which is marked on the inside of the tank or the fill valve body
Chain Slack: The Detail Most People Get Wrong
Chain length is the most commonly misadjusted part of a flapper installation, and it’s responsible for a large share of callbacks.
With too little slack, the chain stays partially taut after the handle returns, holding the flapper up just enough to let water continuously trickle past. The toilet runs. The fix is adding one or two more links of slack.
With too much slack, the extra chain loops under the flapper when it drops, preventing a flat seal. Water still leaks. The fix is removing a few links or clipping the chain higher on the handle arm.
The right setting is about 1/2 inch of visible slack when the flapper is seated. That’s it. Two minutes spent dialing in the chain prevents a callback the next day.
Flapper Materials and Hard Water
Standard rubber flappers degrade over time from chlorine in municipal water, bacteria in the tank, and mineral buildup in hard water areas. The degradation softens or hardens the rubber unevenly, and the seal fails.
For properties with hard water or high chlorine content, flappers with Microban antimicrobial protection and chlorine-resistant materials last significantly longer than standard rubber. The Fluidmaster 502 PerforMAX Water-Saving Toilet Flapper (3-Pack) is rated for 1.28 to 3.5 GPF toilets, adjustable for water savings, and chlorine-resistant. Buying a 3-pack on the same visit makes sense for multi-bathroom properties.
In commercial settings or heavy-use applications where flappers wear faster, the Fluidmaster PRO54 Heavy Duty Flapper is built for exactly that use case. The 10-inch chain attaches to either the side pegs or over the overflow tube neck.
For installations on older 3.5 GPF pre-1994 toilets in hard water areas, the Fluidmaster 501R3P8 Chlorine-Resistant Universal Flapper with Microban is built specifically for that combination. The solid frame prevents twisting, and the Microban protection fights bacteria-driven breakdown.
When to Replace the Fill Valve at the Same Time
A flapper swap is a fast repair, but if the fill valve is more than five years old, noisy, or cycling in short bursts, replacing it during the same visit saves a return trip.
Signs the fill valve needs attention:
- High-pitched hissing from the tank even after the flapper is replaced
- Short, cycling refills that never settle
- Visible mineral deposits around the valve body
- The waterline won’t hold steady at the fill mark
Browse: fill valves at SupplyHouse for direct replacements. For a full tank overhaul, the flush valve, flapper, fill valve, and hardware can all go at once. That repair is covered in the guide to replacing a toilet flush valve.
FAQs
How long does a toilet flapper last?
Most rubber flappers last three to five years under normal residential use. Hard water, high chlorine, or in-tank drop-in cleaners accelerate degradation. Flappers with Microban protection and chlorine-resistant materials run longer than standard rubber. In commercial settings, replacement intervals are shorter.
Can in-tank bowl cleaners damage a flapper?
Yes. Drop-in bleach tablets or chlorine-based cleaners placed in the tank directly contact the flapper and accelerate rubber breakdown. Fluidmaster specifically warns against using bleach-based in-tank cleaners with their flappers. If in-tank cleaners are already in use, chlorine-resistant flappers are the right choice.
What does the number of links on the chain matter?
It matters a lot. Too few links pulls the flapper open when the handle returns to rest. Too many lets the chain loop under the flapper, preventing a flat seal. Both cause continuous leaking. About 1/2 inch of slack when the flapper is seated is the target. Adjust by clipping the chain at a different link on the handle arm before cutting anything.
What if the toilet still runs after replacing the flapper?
Run the dye test again. Color in the bowl without a flush means the flapper still isn’t sealing. Check that the flapper is centered on the valve seat and lying flat with no twist. Check chain slack. If the seat itself is pitted, cracked, or has heavy mineral buildup, no flapper will seal against it and the flush valve needs full replacement.
Does the replacement flapper need to be the same brand as the toilet?
Not necessarily for most standard valve seats. Universal flappers from Korky and Fluidmaster fit the vast majority of 2-inch and 3-inch flush valves across brands. TOTO G-Max toilets are an exception — the valve seat geometry is specific enough that a TOTO-rated flapper like the Korky 2023BP is the better call to avoid seal issues.
How is a flapper replacement different from a flush valve replacement?
A flapper is just the rubber seal that opens and closes over the flush valve seat. The flush valve is the entire assembly mounted to the bottom of the tank. Replacing only the flapper takes under 30 minutes and doesn’t require draining the tank. Replacing the full flush valve requires emptying the tank, removing it from the bowl, and installing a new valve assembly. See the flush valve replacement guide for that procedure.
What’s the difference between a 2-inch and 3-inch flapper?
The numbers refer to the diameter of the flush valve opening the flapper seats over. Most toilets manufactured before 2005 use 2-inch flush valves. High-efficiency toilets manufactured after 2005 increasingly use 3-inch valves, which open wider to dump water faster with less volume per flush. Measure the tank opening or check the toilet model number before ordering.
Can a homeowner replace a toilet flapper?
Yes. It’s one of the most accessible DIY plumbing repairs. No soldering, no cutting, no special tools. The job is unclipping an old rubber seal, clipping on a new one, adjusting chain slack, and running a dye test. For homeowners comfortable removing the tank lid and turning a stop valve, it’s a straightforward fix.
How much water does a leaking flapper waste?
A slow flapper leak wastes between 30 and 500 gallons per day depending on severity. A running toilet is one of the largest sources of residential water waste. Replacing a failed flapper is one of the highest-impact fixes per minute of labor in residential plumbing.
Is it worth buying a multi-pack of flappers?
For multi-bathroom properties or rental units, yes. The Fluidmaster 502 3-Pack covers multiple toilets on the same visit and keeps a spare on hand for the next call. SupplyHouse also offers box pricing on flappers for contractors stocking up.
The Fix Is in the Flush
A running toilet is almost never an emergency, but it’s also never free. A worn flapper wastes dozens of gallons a day, quietly. The repair itself is one of the fastest in the trade — no tank removal, no supply line work, no mess. Identify the flush valve size, pick the right flapper, clip it on, dial in the chain, and run the dye test. That’s the whole job. For toilet flappers that fit the valve seat and hold their seal, browse the full selection at SupplyHouse:
Toilet Flappers at SupplyHouse | All Toilet Parts | Fill Valves | Flush Valves