
Condensate pumps keep heating and cooling equipment from leaving puddles on the floor. They collect water from air conditioners, high-efficiency furnaces, and dehumidifiers, then move it to a drain point. When a pump fails, water pools, safety switches trip, and the system can shut down.
Replacement is straightforward with the right pump, a few tools, and a clear plan. The guide below covers how the pump works, how to pick the correct model, where common installs go wrong, and how to swap one safely and cleanly.
What a condensate pump does
Cooling coils and condensing appliances wring moisture out of air. That water collects in a pan or drain outlet. If gravity cannot carry it to a drain, a small reservoir and motorized pump take over.
Inside a typical unit:
- The Reservoir collects water
- The Float switch rises with water and starts the motor
- The Impeller pushes water through the discharge tube
- The Safety switch (on many models) interrupts equipment if the reservoir overfills
Signs replacement is due
- Standing water around the furnace, air handler, or coil cabinet
- Humming sound without discharge from the outlet tube
- Rapid on-off cycling
- Equipment shutdown from a tripped safety circuit
- Cracked reservoir, leaks at fittings, or a seized float
Choosing the right replacement, step by step
Replacement goes smoothly when the new pump matches the job’s specs. Gather these details first.
- Voltage
Most residential pumps are 115 to 120 V. Mini-split kits and some international-voltage pumps run 230 V. Match the nameplate.
- Required head lift
Measure the vertical rise from the pump outlet to the highest point of the discharge run, then to the drain. Pick a pump rated beyond that height so the pump is not at its limit.
- Flow rate
Typical homes sit in the 65 to 100 GPH range. Higher humidity or long horizontal runs with many bends benefit from a higher rated model.
- Reservoir and inlet layout
Match the inlet location, reservoir size, and outlet barb so tubing lands without stress.*
Tools and materials
- Screwdriver or nut driver
- Utility knife or tubing cutter
- Towels or a small bucket
- Replacement condensate pump
- New discharge tubing if the old line is brittle or kinked
- Vinyl Tubing and Drain-Lines: https://www.supplyhouse.com/Vinyl-Tubing-Drain-Lines-24602000
Optional items that add reliability:
- Check valve or discharge adapter
- Little Giant CV-10 check valve: https://www.supplyhouse.com/Little-Giant-599065-CV-10-Condensate-Pump-Accessory-Discharge-Adapter-Check-Valve
- Condensate overflow safety switch
- Neutralizer for condensing appliances
- Axiom NC-2 NeutraPal kit: https://www.supplyhouse.com/Axiom-NC-2-NeutraPal-Condensate-Neutralization-Kit
Installation planning that prevents callbacks
- Discharge routing
Keep runs as short and straight as possible. Avoid tight bends that can trap debris. Horizontal sections benefit from a gentle slope toward the drain.
- Check valve
A check valve at the outlet prevents backflow that can refill the reservoir after the pump stops.
- Trap and venting
Equipment often requires a P-trap at the coil drain to prevent air bypass. The pump’s own outlet does not need a trap.
- Where the water goes
Discharge to an approved drain point such as a laundry sink tailpiece, a standpipe, or a dedicated condensate drain. Outdoor discharge invites freezing and algae growth.
- Condensing equipment
Many jurisdictions require neutralization before discharge. A compact in-line unit like the Axiom NC-2 protects drains and keeps the job compliant.
Step-by-step replacement
1) Power down
Shut off power at the service switch or breaker. Unplug the pump if corded.
2) Disconnect tubing
Remove the discharge tube from the outlet barb. Pull the inlet tube from the equipment’s drain outlet. Keep a cup or towel ready for residual water.
3) Remove the old pump
Lift the unit out or remove mounting screws. Empty the reservoir into a bucket.
4) Set the new pump
Place the unit level. Position it so the inlet tube slopes gently downward into the reservoir.
5) Connect tubing
Slide the discharge tube over the outlet barb and secure with a clamp. Route to the drain without kinks. Add a check valve if the old line siphoned back into the tank.
6) Wire safety switch if present
Many pumps provide low-voltage safety terminals. Wire in series with the thermostat call to interrupt operation if the reservoir overfills. Use the pump’s wiring diagram.
7) Test
Restore power. Pour water into the reservoir. The float should rise, the pump should start, water should discharge, and the motor should stop once the tank empties.
Sizing quick guide
- Head lift is the most important spec. Measure the true vertical rise plus a small margin.
- Flow curve matters when long horizontal runs or many elbows are present. A model with higher GPH at the required head handles those runs better.
- Safety switch is recommended in finished spaces. Tripping that switch is better than flooding a closet or ceiling.
Diagnostic cheatsheet
| Symptom | Likely cause | Fast fix |
| Pump hums, no water discharge | Blocked outlet tube or stuck check valve | Clear tubing, replace or clean check valve |
| Pump runs constantly | Backflow into reservoir, stuck float, long lift near max rating | Add or replace check valve, clean float, step up to higher head model |
| Water drips from cabinet | Pan outlet clogged, no P-trap, or pump not level | Clear coil outlet, add or clean P-trap at equipment, level pump |
| Safety switch trips | Reservoir not draining, kinked hose, failed motor | Unkink hose, verify power, replace pump if motor is seized |
| Algae returns quickly | Warm dark tubing and slow drainage | Flush lines, consider clear braided or rigid vinyl with fewer sags |
Mini-split notes
Ductless systems often use compact reservoir or peristaltic-style pumps that tuck inside the line-hide or above the cassette. Keep lift within rated limits and route a serviceable discharge line. When space is tight, kits like Aspen Mini Aqua Silent Plus 230 V fit well.
Link for reference: https://www.supplyhouse.com/Aspen-Pumps-83812-Aspen-Mini-Aqua-230V-Silent-Plus-Pump-83812
Parts and accessories roundup
- Condensate pumps, full category
https://www.supplyhouse.com/HVAC-Condensate-Removal-Pumps-1878000
- Common 115 V replacement
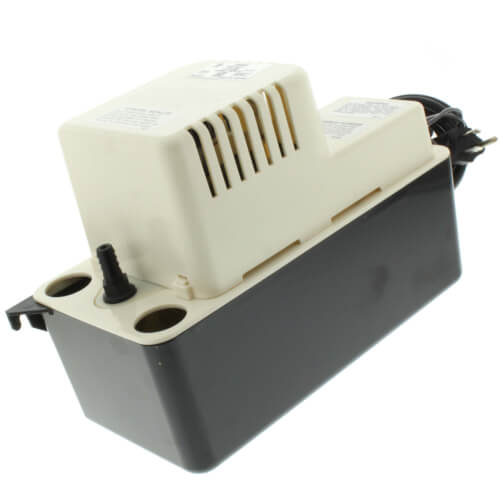
Little Giant VCMA-20ULS: https://www.supplyhouse.com/Little-Giant-554425-VCMA-20ULS-80-GPH-Automatic-Condensate-Removal-Pump-w-Safety-Switch-14724000-p
- High-lift 120 V option
DiversiTech CP-22: https://www.supplyhouse.com/DiversiTech-ULTRACP-22-Asurity-Ultra-Condensate-Pump-120V-22-Lift
- Compact 115 V alternative
Beckett BK171UL: https://www.supplyhouse.com/Beckett-Pumps-BK171UL-Medium-Condensate-Pump-w-Safety-Switch-17-Ft-Shutoff-115V
- Tubing and fittings
Vinyl tubing and drain-lines: https://www.supplyhouse.com/Vinyl-Tubing-Drain-Lines-24602000
- Check valves and adapters
CV-10 discharge adapter/check valve: https://www.supplyhouse.com/Little-Giant-599065-CV-10-Condensate-Pump-Accessory-Discharge-Adapter-Check-Valve
- Overflow safety switches
Category: https://www.supplyhouse.com/Condensate-Switches-24603000
- Neutralizers for condensing appliances
Axiom NC-2 NeutraPal kit: https://www.supplyhouse.com/Axiom-NC-2-NeutraPal-Condensate-Neutralization-Kit
Maintenance that extends service life
- Flush the reservoir every cooling season with a mild vinegar solution.
- Inspect tubing for algae, biofilm, or kinks.
- Confirm free float travel and a tight check valve seal.
- Keep discharge runs short with gentle sweeps to reduce clog risk.
FAQs
How long does a condensate pump last?
Typical range is three to seven years. Regular cleaning and a check valve at the outlet extend life.
Is upsizing okay?
Yes, provided voltage matches and the head rating meets or exceeds the lift. Larger reservoir models reduce short cycling.
Where should the water go?
Approved indoor drains such as a laundry sink tailpiece, a standpipe, or a dedicated condensate drain. Outdoor discharge invites freezing and algae buildup.
Do condensing boilers and furnaces need special treatment?
Many locations require neutralization to prevent acidic condensate from harming plumbing. Compact kits like the NC-2 handle this neatly.
The bottom line
A working condensate pump protects equipment, nearby finishes, and the schedule. Replacement takes a short block of time, basic tools, and attention to head lift, tubing layout, and safety wiring. All parts referenced above are available at Supplyhouse, including pumps, tubing, check valves, safety switches, and neutralizers, so both homeowners and pros can finish the job in one trip.