
A thermostat swap is one of the most common residential HVAC jobs. It’s also one of the most mishandled. The unit gets slapped on the wall, a wire lands on the wrong terminal, and two days later a callback comes in because the system won’t cool or the heat won’t shut off. Done right, a thermostat installation takes under an hour and stays trouble-free for years. Done wrong, it wastes everyone’s time. Here’s how to do it right, from pulling the old unit to first-run testing, covering every system type along the way.
Before Touching the Wall: Compatibility and System Identification
Not every thermostat works with every HVAC system. Putting the wrong stat on a heat pump creates real problems. Getting this right first saves the trip back.
System types and what they require:
| System Type | Typical Wire Count | Key Terminal Needed | Notes |
| Conventional (gas/oil/electric forced air) | 4 to 5 wires | R, G, W, Y, C | Single-stage most common; multi-stage needs W2/Y2 |
| Heat pump | 5 to 7 wires | R, G, O/B, Y, W/AUX, C | O/B polarity critical; reversing valve wired here |
| Hot water radiant / hydronic | 2 to 4 wires | R, W (zone valve) | No G terminal; fan control not needed |
| Steam | 2 wires | R, W | Simple on/off only; no multi-stage |
| Electric baseboard (line voltage) | 2 heavy wires | Line, Load (120V or 240V) | Requires line-voltage stat; low-voltage stat will not work |
| Millivolt (gravity furnace, gas fireplace) | 2 wires | TH, TH | No common power; needs millivolt-rated stat |
Check wire count before ordering a replacement. Pull the old thermostat off the wall and count conductors. A smart stat that requires a C-wire won’t work on a four-wire setup without adding one. Get a replacement stat rated for the correct system stages: a 2H/2C stat on a single-stage system is fine; a 1H/1C stat on a two-stage system is not. For a full breakdown of wire colors, conductor counts by system type, and C-wire options, see Understanding Thermostat and Low-Voltage Wiring for Every Home.
Browse the full thermostats category on SupplyHouse or filter directly to Honeywell Home thermostats to match the right model to the system.
Tools and Materials Needed
No exotic gear required. Most of this is already on the truck.
- Non-contact voltage tester (dual-range model that reads down to 12V AC is ideal for low-voltage confirmation)
- Phillips and flathead screwdrivers
- Drill with bits and drywall anchors
- Level
- Needle-nose pliers
- Wire stripper
- Painter’s tape and a marker (for labeling wires)
- Smartphone or camera (photograph the old wiring before disconnecting anything)
The Klein Tools NCVT-3P dual-range tester detects down to 12V AC, making it useful for both the 24V low-voltage side of the thermostat circuit and standard 120/240V line verification.
Step-by-Step: Removing the Old Thermostat
- Cut power at the breaker. Locate the breaker for the furnace or air handler and switch it off. For a heat pump, flip both the air handler and the outdoor condenser breaker. Do not rely on the thermostat’s own off mode.
- Verify no power. Hold a non-contact voltage tester near each thermostat wire after removing the cover. No beep or light confirms the circuit is dead.
- Photograph the wiring. Before touching anything, photograph the terminal block from two angles. Get wire colors and their terminal letters clearly in frame. This photograph is insurance.
- Label every wire. Wrap a strip of painter’s tape around each conductor and write the terminal letter it came from: R, C, G, W, Y, O, B, etc. Do this even when the photograph is clear.
- Disconnect the wires. Loosen terminal screws and free each wire. Wrap the bare ends around a pencil temporarily to keep them from falling back into the wall cavity.
- Remove the old base plate. Unscrew it from the wall. Note the condition of the wall behind it; a larger cover plate on the new stat may be needed if the old one left marks or damage.
Step-by-Step: Mounting the New Base Plate
- Feed wires through the new base plate. Thread the labeled conductors through the center opening before positioning the plate.
- Level the base plate. Hold it flat against the wall with a level. A crooked thermostat is harmless electrically, but homeowners notice.
- Mark and drill. Mark the screw hole positions, drill pilot holes, and install drywall anchors if screws won’t hit a stud. Most base plates include anchors.
- Secure the plate. Drive the mounting screws snug but not so tight they crack the plastic.
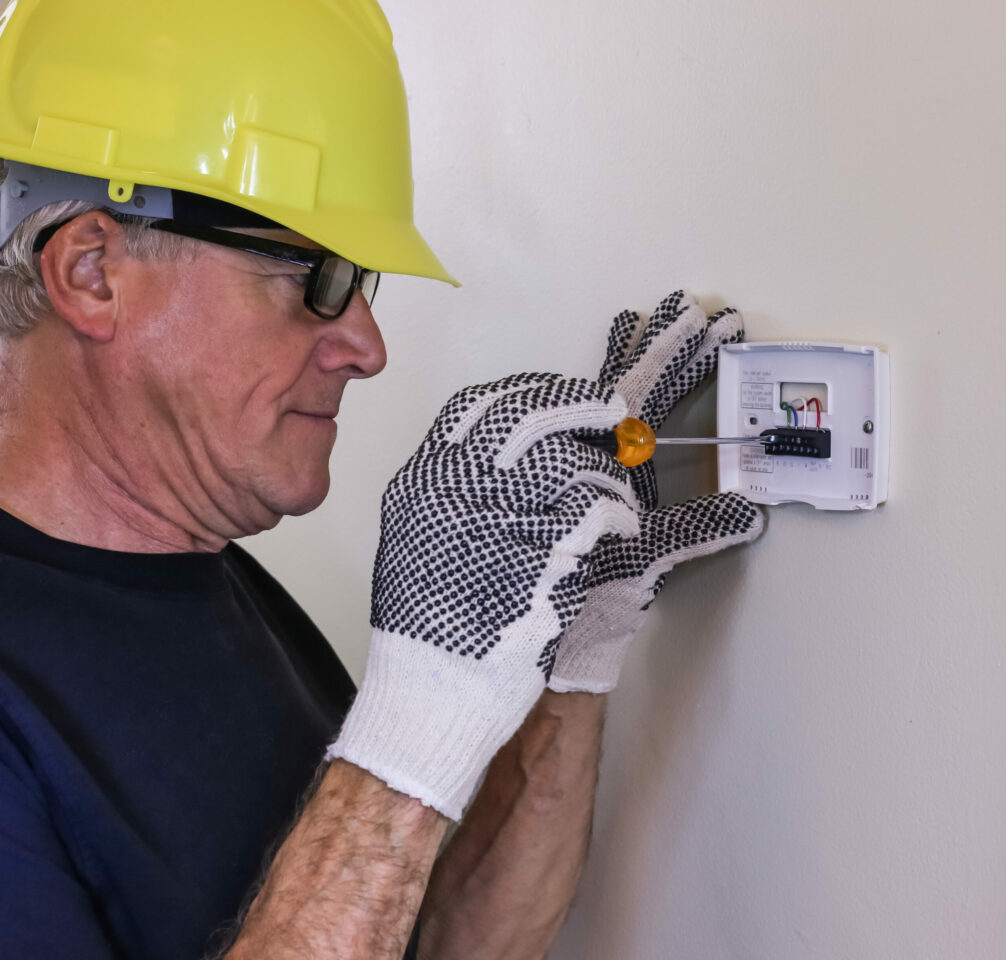
Step-by-Step: Wiring the New Thermostat
The wiring step is where most callbacks start. Take it methodically.
- Match the new terminal layout to the labels. Every terminal on the new stat is lettered. Compare to the tape labels on each wire.
- Strip wire ends if needed. About 3/8 inch of bare copper is enough. Too much bare wire creates shorts; too little creates a loose connection.
- Seat each wire firmly. Insert into the correct terminal and tighten the screw until the wire won’t pull free with a gentle tug.
- Check the C-wire. Smart thermostats and most Wi-Fi stats require a C-wire for constant 24V power. If none is present, options include repurposing an unused conductor, running new 18/6 cable, or installing a C-wire adapter at the air handler.
- Verify heat pump O/B polarity. On a heat pump, the O/B terminal controls the reversing valve. Check the original thermostat’s wiring diagram or the equipment manual. Reversing O and B causes the system to heat when calling for cooling.
For a deeper dive on wire colors, terminal designations, multi-stage systems, and C-wire solutions, see How to Wire a Thermostat and Understanding Thermostat and Low-Voltage Wiring for Every Home on the Real Talk blog.
Step-by-Step: First-Run Testing
- Restore power at the breaker.
- Set the system to Heat, raise the setpoint above room temperature. The furnace or boiler should fire within a few minutes. Confirm airflow or heat output at a register or radiator.
- Set the system to Cool, lower the setpoint below room temperature. The compressor should engage within 5 minutes (the compressor protection delay). Confirm cold air at a supply register.
- Test the fan. Switch Fan to On. The air handler fan should run independently of heating or cooling calls.
- Check the display for fault codes. Any error code at startup points to a wiring issue. Consult the thermostat’s installation guide for code definitions. For a systematic approach to tracking down wiring faults, How to Wire a Thermostat covers the most common culprits.
- Verify thermostat power. A smart or Wi-Fi stat that’s dropping to battery-only mode despite a C-wire connection has a continuity problem at the C terminal, at the air handler terminal block, or in the cable run itself.
Thermostat Placement: Where the Stat Goes Matters
A thermostat in a bad location reads inaccurate temperatures and causes the system to short-cycle or overrun. The right spot makes the whole system perform better.
- Interior wall, 5 feet above floor. Away from exterior walls where temperature variation is highest.
- No direct sunlight. A stat near a south-facing window gets radiant heat from the sun and calls for cooling when the rest of the house is comfortable.
- Away from supply registers and return grilles. Conditioned air blowing directly across the sensor gives a false reading. Keep at least 3 feet of clearance.
- Not in dead-end hallways. Rooms that see little airflow create temperature stratification. The stat in a hallway closet will never read what the living room actually feels like.
- Not above heat sources. Lamps, televisions, and appliances all radiate heat. Any of those sitting below the thermostat will drive unnecessary cooling calls.
Smart Thermostat Considerations
Smart thermostats add Wi-Fi connectivity, scheduling, remote access, and sometimes geofencing. Installation is the same process, with a few additions.
- C-wire is non-negotiable. Every mainstream smart stat requires constant 24V power from the C terminal. Confirm this before recommending or ordering.
- App setup happens after mounting and wiring. Connect to Wi-Fi, create or log into the manufacturer account, and pair any remote sensors. Do this before leaving the job.
- Confirm system type in software settings. Smart stats ask whether the system is conventional or heat pump during setup. Wrong selection causes the exact same problems as wiring the O/B backwards.
- Check for software updates. A freshly installed smart stat may pull a firmware update in the first 24 hours. Warn homeowners the system may be temporarily unresponsive.
The Honeywell Home T6 Pro (2H/2C) handles most residential installs. For multi-stage heat pump systems, the T6 Pro 3H/2C covers larger configurations. Radiant and hydronic systems pair well with the T6 Pro Hydronic with Slab Sensor for accurate floor-temperature control.
Common Installation Mistakes (and How to Avoid Them)
| Mistake | What Happens | Fix |
| No photo of old wiring | Can’t recover wire positions after disconnecting | Always photograph before touching anything |
| C-wire missing on smart stat | Stat runs on battery, app disconnects, low-power errors | Run new cable, repurpose conductor, or install C-wire adapter |
| O/B reversed on heat pump | System heats on cooling call, cools on heat call | Confirm reversing valve polarity before wiring; check equipment manual |
| Wire seated too shallow | Intermittent system response, loose connection arcs | Tug-test every wire after seating; re-terminate if it pulls free |
| Thermostat in direct sunlight | False high readings, constant cooling calls | Relocate stat or shield from radiant heat |
| Wrong stat for line-voltage system | No heat, possible damage to thermostat or wiring | Electric baseboard requires a line-voltage thermostat rated for 120V or 240V |
FAQs:
How long does a thermostat installation take?
For a straight swap with existing wiring, allow 30 to 45 minutes. Adding a C-wire or troubleshooting old wiring adds time. New construction rough-in with cable run takes longer.
Does cutting power at the breaker matter if the thermostat has a power switch?
Yes. The thermostat’s off mode doesn’t cut power to the wiring. The control board in the air handler or furnace stays live. Always cut the breaker.
What if there’s no C-wire and a smart thermostat is needed?
Three options: repurpose an unused conductor already in the cable bundle (common on older 18/5 runs with a spare wire), run new 18/6 cable, or install a C-wire adapter at the HVAC control board. The adapter option avoids pulling wire but adds a small device inside the air handler.
Can the same thermostat work on a heat pump and a conventional system?
Most modern programmable thermostats support both, but the system type must be selected during installation setup. A stat that works on both will have terminal positions for O/B and W/AUX. Verify the stat is rated for the system before purchasing.
What does a blinking or blank display mean after installation?
A blank display usually means no power to the stat. Check the breaker, verify the C-wire connection at both ends, and confirm the transformer in the air handler is functioning. Some stats also have a battery drawer that must be installed before the display activates.
The system runs but won’t reach setpoint. What’s wrong?
This is usually a system sizing or equipment issue rather than a thermostat problem, but check the installation settings first. Multi-stage systems need the correct stage count entered in the thermostat setup menu. A single-stage setting on a two-stage system underperforms.
Can a thermostat be installed without a C-wire on a conventional system?
Basic non-smart thermostats run on batteries and don’t need a C-wire. Programmable stats often run on batteries as well. Wi-Fi and smart stats require the C-wire for the continuous power draw from connectivity hardware. The product listing always specifies power requirements.
What’s the difference between RC and RH terminals?
RC powers the cooling circuit and RH powers the heating circuit. On most residential single-transformer systems, both terminals are connected together with a factory jumper. Heat pumps and some commercial systems use separate transformers and require both wired independently. If the old thermostat had a jumper between RC and RH, the new one likely will too.
Is there a minimum distance between the thermostat and HVAC equipment?
No code minimum, but long cable runs over 100 feet can introduce voltage drop on 18 AWG wire in demanding multi-stat setups. For typical residential installs from equipment room to living area, standard 18-gauge cable handles the run without issue.
What if the wall plate from the new thermostat doesn’t cover the old paint marks?
Most manufacturers sell larger decorative cover plates as accessories. Many T-series stats include a small cover plate in the box with a larger version available separately. Painting the wall and letting it cure before mounting the new plate is always an option if no cover plate fits.
Before You Leave the Job
A thermostat installation done correctly is a non-event. The system fires up, holds setpoint, and nobody calls back. Done incorrectly, it’s a callback waiting to happen. The difference is almost always in the details: confirming system type before ordering, photographing the old wiring before disconnecting anything, verifying the C-wire situation, and checking every wire seat before restoring power.
Shop thermostats at SupplyHouse with same-day shipping on most models. Filter by system type, stage count, and brand to find the right fit fast.