
Most connection failures are not caused by bad fittings. They are caused by bad prep.
Tubing carries potable water, hydronic fluid, gas, and refrigerant. Every one of those systems depends on clean cuts, smooth edges, and proper surface preparation. Burrs create turbulence. Deformation weakens seals. Contamination damages compressors and valves.
Cutting tubing is mechanical. Prepping tubing is precision.
This guide covers cutting, deburring, chamfering, cleaning, and inspection for copper, PEX, and HVAC refrigerant lines, plus the joining methods that depend on good prep.
Copper tubing options:
https://www.supplyhouse.com/Copper-Tubing-1568000
PEX tubing options:
https://www.supplyhouse.com/PEX-Tubing
Refrigerant line sets:
https://www.supplyhouse.com/Refrigerant-Line-Sets-1690000
What “prepping tubing” means
Tubing prep is the work that happens between measuring and making the connection.
A properly prepped tube has:
- A square cut
- A clean inside edge with no ridge
- A smooth outside edge that will not damage seals
- A clean surface appropriate for the connection method
Skipping prep leads to:
- Leaks at compression and push fittings
- Damaged seals in press systems
- Weak solder joints
- Refrigerant leaks caused by poor flare and debris
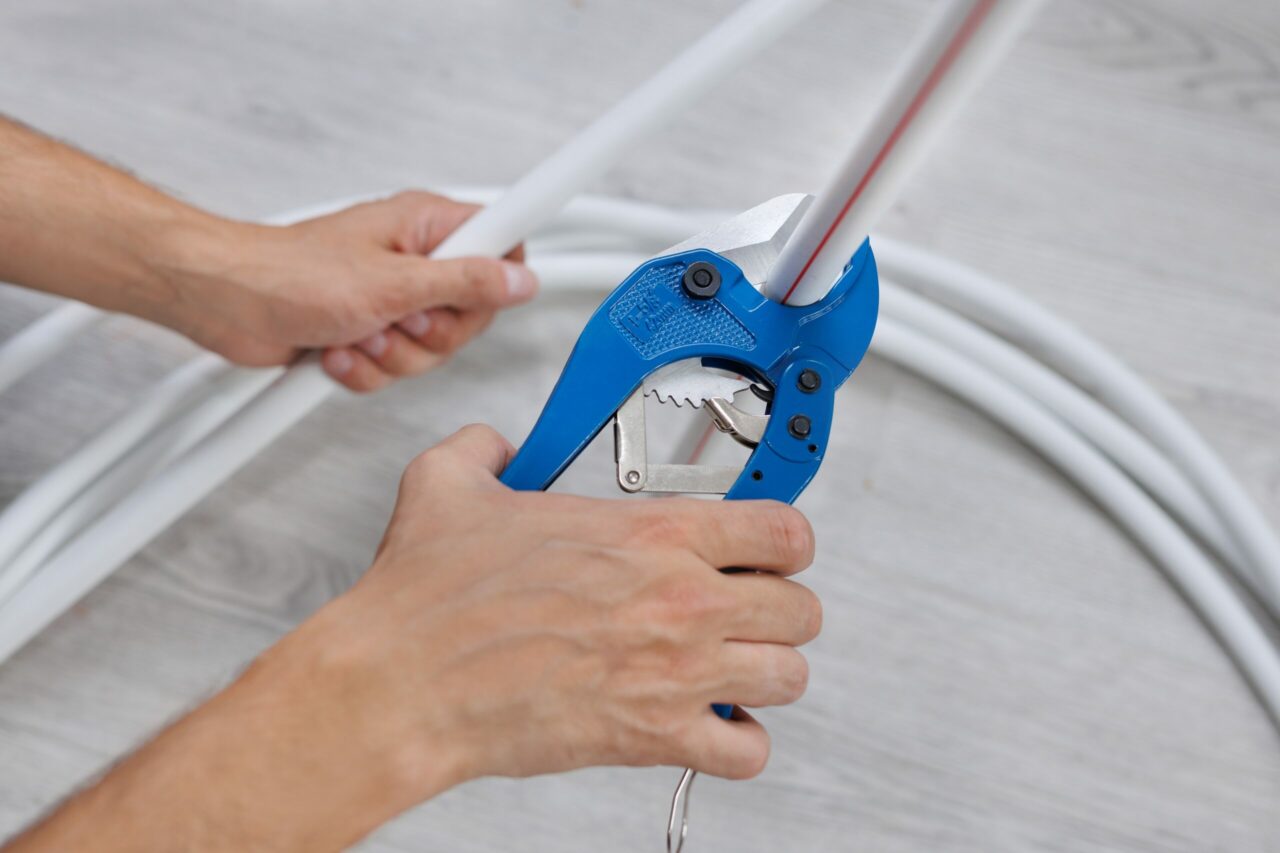
Step 1: Cut tubing square using the right cutter
Different materials cut differently. The goal is always a square cut with minimal deformation.
Pipe and tubing cutters:
https://www.supplyhouse.com/Pipe-Tubing-Cutters-23120000
PEX cutters and tools:
https://www.supplyhouse.com/PEX-Tools-544000
For technique and common mistakes, use this guide:
https://blog.supplyhouse.com/how-to-use-a-pipe-cutter-to-get-clean-square-cuts-every-time/
Copper and refrigeration tubing
Tubing cutters work best because they cut square without sawing burrs into the pipe.
Process:
- Tighten the cutter just until the wheel contacts the tube.
- Rotate one to two turns.
- Tighten slightly.
- Repeat until separation.
Over-tightening at the start compresses the tube and creates a heavier internal ridge, which increases deburring time and risks out-of-round tubing.
PEX needs a clean, square cut. Jagged plastic strands or a tilted cut can cause connection issues with multiple joining methods.
Quick checks:
- Cut is perpendicular
- No flattened section
- No plastic “tails” on the cut edge
If the cut looks questionable, recut.
Step 2: Deburr inside and outside
Deburring removes the ridge left behind by cutting.
Internal burrs:
- Restrict flow
- Add turbulence
- Increase noise in some systems
External burrs:
- Catch on seals
- Prevent full insertion
- Create misalignment at the connection point
Deburring tools:
https://www.supplyhouse.com/Deburring-Tools-30402000
Copper deburring process:
- Ream the inside edge lightly until the ridge disappears.
- Smooth the outside edge.
- Stop once the edge is clean and smooth. Removing too much material can thin the tube wall.
Step 3: Prep the edge for the connection type
Different connection types punish different mistakes.
Press and push style connections
Press and push systems rely on intact seals and correct insertion depth. A sharp outside edge can damage seals during insertion.
PEX press fittings:
https://www.supplyhouse.com/PEX-Press-Fittings-31485000
Push-to-connect fittings:
https://www.supplyhouse.com/SharkBite-Fittings-595000
Practical rule:
- Deburr and lightly ease the outside edge so the tube slides in without biting the seal.
- Mark insertion depth and confirm full seating before pressing or locking.
HVAC refrigerant push-fit connections
Refrigerant push-fit fittings still need clean, round tubing and a properly prepped edge.
Refrigerant push-fit fittings:
https://www.supplyhouse.com/Refrigerant-Push-Fit-Fittings-32680000
Step 4: Clean the surface for soldering or brazing
Good cuts and smooth edges are half the job. Surface cleanliness determines joint quality.
Soldering prep for copper water tube
Soldering relies on clean metal and proper wetting.
Soldering supplies:
https://www.supplyhouse.com/Soldering-Supplies-18680000
Minimum prep steps:
- Clean the tube surface where the fitting seats
- Clean the fitting cup
- Keep the cleaned surfaces free of dirt and oils until assembly
Brazing prep for refrigerant lines
Brazing needs clean copper and controlled technique. Internal contamination in refrigerant lines can cause long-term equipment problems.
Brazing rods:
https://www.supplyhouse.com/Brazing-Rods-35083000
Minimum prep steps:
- Clean to bright metal at the joint
- Keep tube ends protected from debris before connection
Step 5: Inspect before making the joint
Inspection takes seconds and prevents rework.
Check:
- Roundness, especially after aggressive cutting
- Smooth inside edge, no ridge
- Smooth outside edge, no sharp lip
- No deep scratches where seals land
- No debris left inside the tube
If a tube is out-of-round, cut back and redo the prep. Forcing a fitting onto deformed tubing usually ends badly.
Common prep mistakes and what they cause
| Mistake | What shows up later |
| Cutter tightened too aggressively | Out-of-round tube, poor seating |
| Deburring skipped | Flow restriction, seal damage |
| Outside edge left sharp | O-ring or seal damage |
| Copper not cleaned before solder | Weak joint, leaks |
| Debris left in refrigerant line | System contamination risk |
A repeatable workflow for DIY and pros
A consistent sequence lowers errors and speeds up installs.
- Measure and mark.
- Cut square with the correct tool.
- Deburr the inside edge.
- Smooth the outside edge.
- Clean based on the joining method.
- Inspect roundness and edge finish.
- Assemble and complete the joint.
FAQs
How do I deburr copper pipe after cutting?
Use an internal reamer to remove the ridge, then smooth the outside edge with a deburring tool. Deburring tools are here: https://www.supplyhouse.com/Deburring-Tools-30402000
Do I need to deburr PEX?
Most PEX cuts do not require internal deburring if the cut is clean and square. The key is using a sharp cutter from the PEX tools category: https://www.supplyhouse.com/PEX-Tools-544000
PEX-AL-PEX is considered a the exception in this case. PEX-AL-PEX combines the flexibility of plastic with the structural rigidity of an aluminum center. Deburring and chamfering are essential when working with PEX-AL-PEX as the cutting process leaves a flat edge that can damage O-rings on fittings, leading to leak.
Tool can be found here: https://www.supplyhouse.com/PEX-al-PEX-Tools-237000
Why do fittings leak even when tightened properly?
Common causes include an angled cut, out-of-round tubing, burrs preventing full insertion, or debris on sealing surfaces.
What is the fastest way to get clean, square cuts on copper?
A quality tubing cutter and a slow, even tightening method. The how-to guide is here: https://blog.supplyhouse.com/how-to-use-a-pipe-cutter-to-get-clean-square-cuts-every-time/
What should be checked before pressing a fitting?
Confirm smooth edges, full insertion depth, and round tubing. PEX press fittings are here: https://www.supplyhouse.com/PEX-Press-Fittings-31485000
What is the biggest tubing prep mistake in HVAC work?
Leaving shavings or debris in the line and rushing prep. Refrigerant line sets are here: https://www.supplyhouse.com/Refrigerant-Line-Sets-1690000
Wrap-up
Clean cuts and good prep are not extra steps. They are the steps.
Cut square, deburr properly, prep the edge for the connection type, clean the surface for solder or braze work, and inspect before assembly. That process holds up whether the job is a DIY repipe or a full HVAC install.
Stocking the right tools makes all of it easier:
- Pipe and tubing cutters: https://www.supplyhouse.com/Pipe-Tubing-Cutters-23120000
- Deburring tools: https://www.supplyhouse.com/Deburring-Tools-30402000
- PEX tools: https://www.supplyhouse.com/PEX-Tools-544000